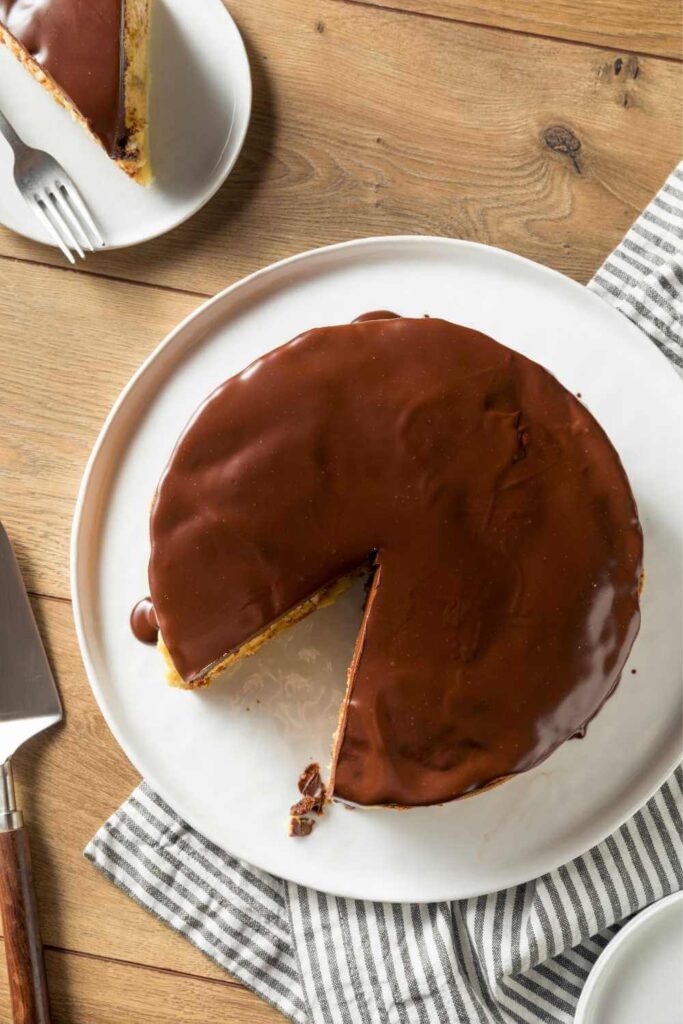
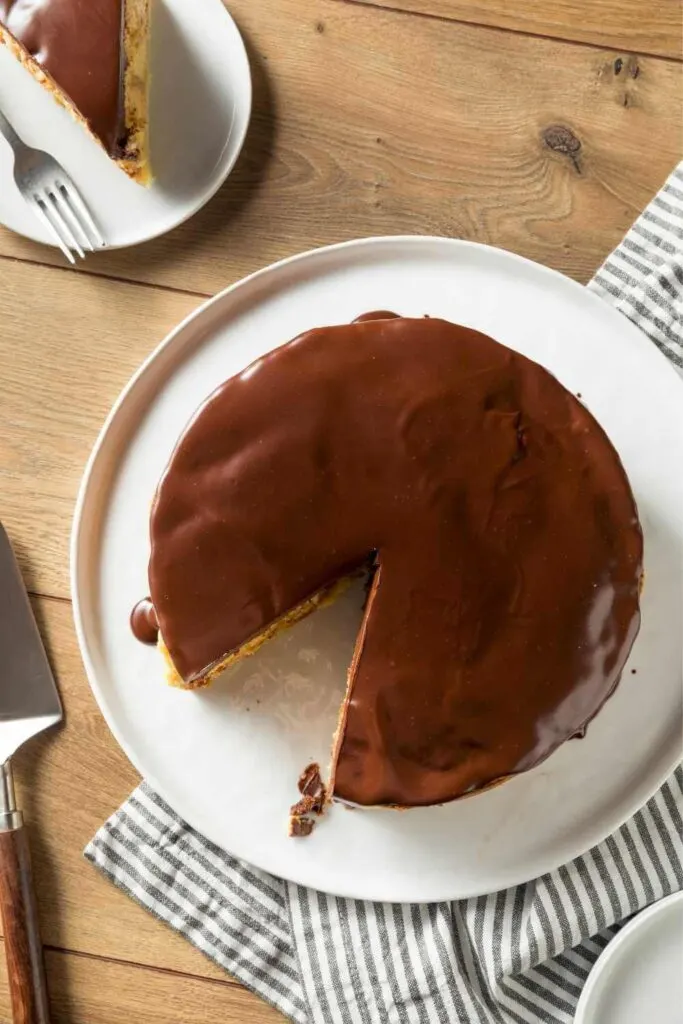
Pioneer Woman Boston Cream Pie is an American classic, a trifecta of tender sponge cake layered with rich vanilla pastry cream covered in a silky chocolate glaze. It’s what sweet dreams are made of!
Despite its beloved name, Pioneer Woman Boston Cream Pie is indeed a cake. Some of our decadent, hypnotic, must-try favorite cake recipes include Lemon Icebox Cake, Moist Banana Cake, Molten Lava Cake, or Chocolate Bundt Cake.


Here’s why this recipe works:
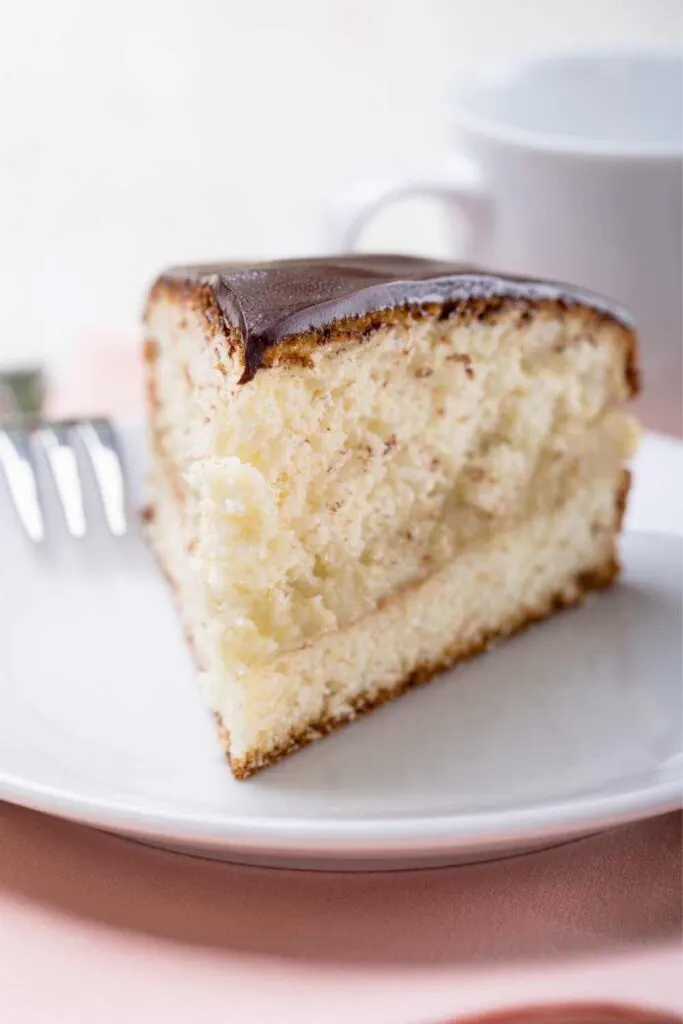
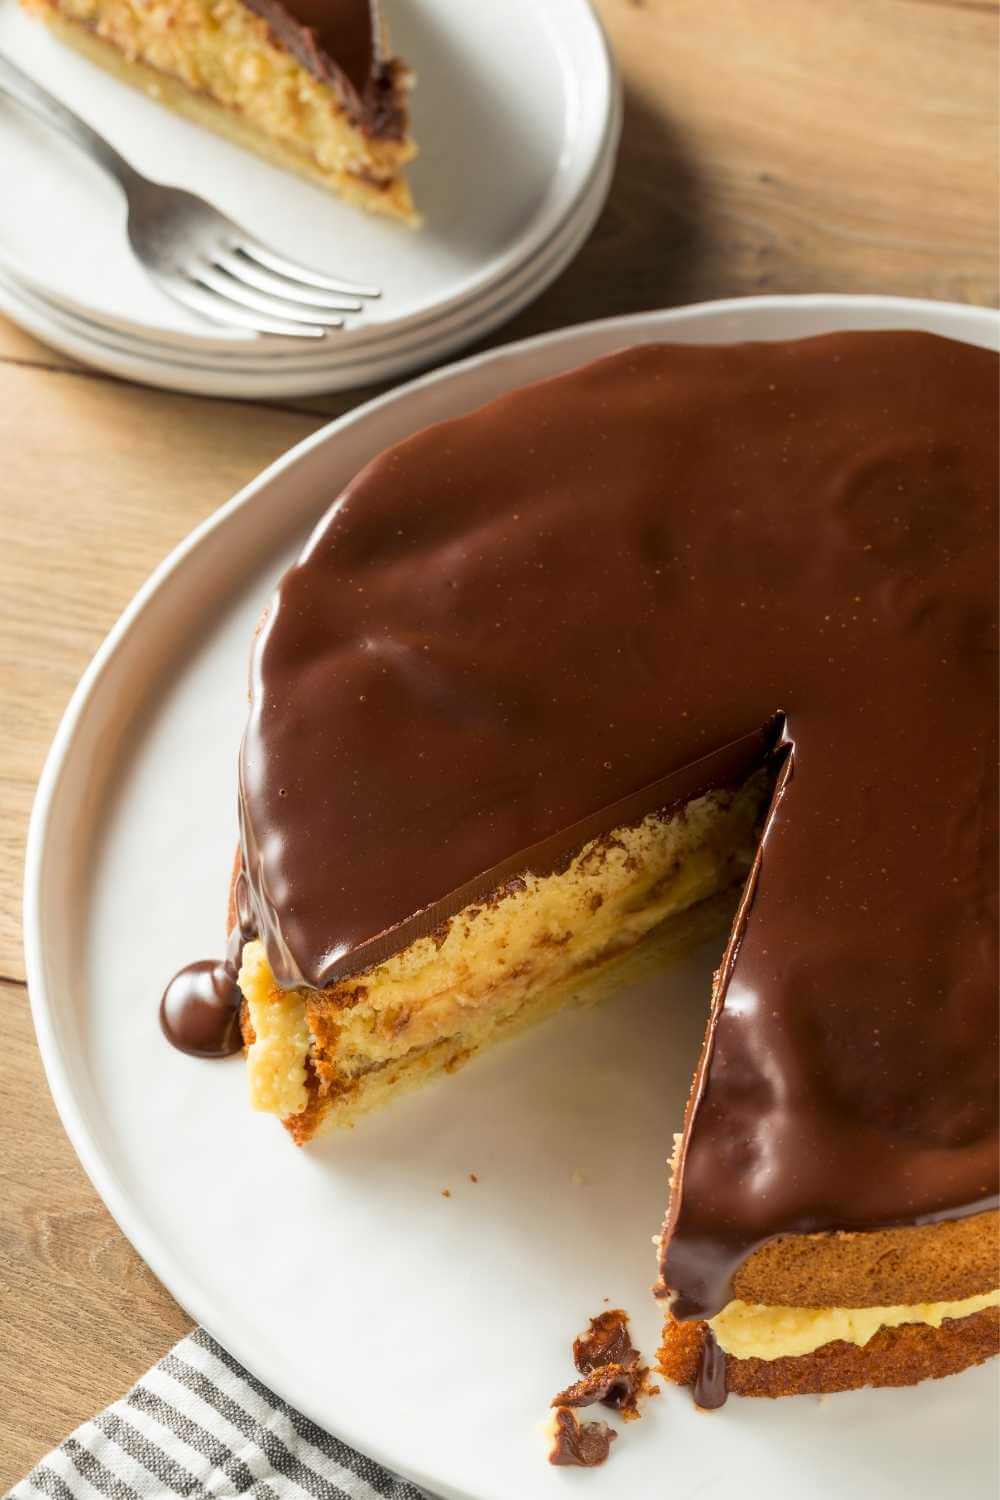
- Buttery sponge cake: Instead of a genoise-like sponge cake that is practically weightless, this recipe uses a hot-milk method, which is more fool-proof and makes a more flavorful, lighter, yet firmer cake.
- Sturdy pastry cream: It is so creamy that you’ll want to eat it with a spoon! Often, pastry cream is thin and finicky, but this Pioneer Woman Boston Cream Pie recipe creates foolproof pastry cream by using cornstarch instead of flour, dissolving the sugar in the hot cream before adding the yolks, tempering the cream, and topping it off with a generous amount of butter to create a sturdier cream that holds up well against slicing.
- Silky chocolate glaze: Chocolate glaze can become dull and hard if left sitting for too long. Corn syrup keeps it soft, shiny, and beautiful even when refrigerated.
Why is it called Boston cream pie?
Pioneer Woman Boston Cream Pie’s name comes from the 19th century when pie pans were more common in kitchens than cake pans, so both desserts were baked in pie pans, and the terms cake and pie were used interchangeably.
What is Pioneer Woman Boston Cream Pie filling made of?
The filling of this Pioneer Woman Boston Cream Pie is pastry cream or creme patissière in French. It’s a smooth custard made with egg yolks and sugar best flavored with vanilla.
Where did the Pioneer Woman Boston Cream Pie originate from?
Pioneer Woman Boston Cream Pie is the official dessert of Massachusetts. It is a state I would like to live in just for that reason alone! Parker House Hotel in Boston claims it first baked Boston Cream Pie at the hotel in the late 1800s.
There may have been sponge cakes with custard fillings at the time, but none had ever been topped with chocolate frosting. It was not common practice to bake a cake with a chocolate topping, so when the hotel chef first created the recipe, it soon became a popular item on the hotel’s menu.
Initially, the name was Chocolate Cream Pie, then Parker Cream Pie, and then Boston Cream Pie as we know it today.
Ingredients That You’ll Need:
- All-purpose flour: Having made this recipe only with all-purpose flour, I assume gluten-free baking flour such as Bob’s Red Mill 1 to 1 could also work.
- Baking powder: This leavening agent is used in hot milk sponge cakes, but not in traditional sponge cakes. The leavening agent helps tenderize the cakes and works with the whipped eggs to help them rise. Because of this, you won’t have to worry about folding the dry ingredients into the whipped eggs to maintain that air. The baking powder will help compensate for the rough handling of the batter.
- Salt: Please use regular old table salt.
- Milk: For the cake, use whole milk. If you have nonfat, skim, or 2% on hand, replace some of the milk with heavy cream for the chocolate glaze, which you will need anyway.
- Heavy cream: You can use heavy whipping cream at the grocery store to make your own half-and-half for the pastry cream. It goes in the chocolate glaze and is combined with milk to make half-and-half.
- Butter: When baking with unsalted butter, you can add a precise amount of salt. If you only have salted butter, you will have to reduce the salt in the recipe.
- Sugar: Only use granulated sugar.
- Eggs: You will need 3 whole eggs for the cake and 6 egg yolks for the pastry cream. The eggs need to be at room temperature. More information is available in the tips section.
- Vanilla extract: For best results, use quality extract.
- Cornstarch: It is easier to work with and produces better results than flour in this recipe for thickening pastry cream.
- Chocolate: The quality of baking chocolate matters. Baking chocolate is hardened, cooled chocolate liquor with a higher cocoa butter content than chocolate chips because it’s meant to be baked with and therefore melts more smoothly.
- Corn syrup: It keeps the ganache smooth, shiny, and flexible after refrigeration. You can omit the corn syrup if you are really opposed but the ganache will not be as smooth, shiny, flexible, or successful overall.
How To Make Pioneer Woman Boston Cream Pie Ahead?
This Pioneer Woman Boston Cream Pie can be made in stages and assembled or the completed cake can be made ahead and stored:
- Pastry cream: Cover and chill in the refrigerator for up to two days before assembly.
- Hot milk sponge cake: You can store cooled cakes in plastic wrap at room temperature for up to 24 hours or freeze them for up to two months, then thaw them before assembling.
- Finished cake: Including the chocolate glaze, the Pioneer Woman Boston Cream Pie can be assembled and stored in the refrigerator for up to one day. Cover the cake completely to prevent drying out. Use a container or loosely tent with foil to avoid damaging the glaze. Before serving, let the cake come to room temperature.
How To Make Pioneer Woman Boston Cream Pie?
Pastry Cream:
- Over medium heat, add the heavy cream, 1/2 cup milk, sugar, and salt to a medium saucepan. Bring to a simmer, then remove from heat.
- Whisk together 1/2 cup milk, egg yolks, and cornstarch in a medium bowl until smooth. As you whisk constantly, pour 1/4 cup of the hot cream mixture into the egg mixture, then add another 1/4 cup, followed by another 1/4 cup, followed by the remainder of the cream in a slow stream (don’t stop whisking until all of the creams is added).
- Back into the saucepan, and pour the tempered mixture. Over medium heat, bring to a simmer, whisking constantly until it is the texture of thick pudding. After thick and glossy and bubbles pop on the surface, cook for an additional minute.
- Through a fine mesh strainer, strain the mixture into a bowl, then add butter and vanilla until completely smooth. Spray a piece of plastic wrap lightly with nonstick cooking spray and place it directly on the pastry cream (this prevents skin from forming). Let cool in the refrigerator for at least 2 hours, up to 2 days.
Hot Milk Sponge Cake:
- Preheat the oven to 325°F. Prepare two 9-inch round cake pans by lining them with parchment paper and spraying them with nonstick cooking spray with flour, or buttering and flouring them.
- Whisk together the flour, baking powder, and salt in a medium bowl.
- Microwave the milk and butter in a microwave-safe liquid measuring cup or bowl until the butter has melted. Stir in the vanilla. Wrap in foil to keep warm.
- Whisk eggs and sugar together on high speed until they are thick, airy, light, and fluffy, about 4-5 minutes with a stand mixer fitted with a whisk attachment, or using a hand mixer fitted with a whisk attachment. As soon as the mixture is done, it should fall back like a ribbon that does not dissolve back into the mixture right away.
- Slowly whisk the warm milk and butter into the egg mixture until combined with the mixer on low speed. Fold in the flour mixture gently after removing the cake from the mixer. Be careful not to overmix.
- Divide the batter evenly between the prepared cake pans as quickly as possible (a kitchen scale is helpful for even cakes).
- Bake the cakes until an inserted toothpick comes out clean and the edges begin to pull away from the pan, approximately 23-28 minutes. Press gently on the top and it should spring back up. If the indentation remains, cook the cakes for a little longer. (Times can vary depending on your pans)
- Cool the cakes completely in the pans. Upon cooling, the cakes can be wrapped in plastic wrap and stored at room temperature for up to 24 hours until assembling cake.
Assemble The Cake:
- Place one of the cakes right-side-up in the center of a cake plate or pedestal. Spread the pastry cream 1/4 inch from the edges of the cake.
- Cover the cream with the second cake, bottom side up. Lightly press to adhere and spread the cream to the edges. Place the cake in the refrigerator while you prepare the chocolate glaze.
Chocolate Glaze:
- In a medium microwave-safe bowl, combine the heavy cream and corn syrup. Microwave for about two minutes, until just boiling. Remove from the microwave and stir in the chopped chocolate. Allow standing for 5 minutes to allow the chocolate to melt, then whisk vigorously until smooth.
- Spread the glaze over the cake and let it drip down the edges if desired. For cleaner cuts, chill the ganache for 30-60 minutes in the refrigerator or cover with a cake dome until ready to serve. If the cake has been refrigerated for more than 1 hour, let it come to room temperature before serving (it will taste better and the glaze will soften).
- Slice with a hot knife for the cleanest cuts. Either run the knife under hot water or fill a large glass with hot water, then dip the knife in the water before each cut. After every cut, wipe the knife clean with a paper towel.
Recipe Tips
- Use room temperature egg yolks for the pastry cream: Using this method, the cornstarch will dissolve more smoothly into the egg yolks and aid in tempering the eggs more gradually, so there is less likelihood of scrambling.
- Use room temperature eggs for the cake: Eggs at room temperature allow the batter to whisk to a higher volume, which results in a softer, fluffier texture. Cold eggs, on the other hand, can cause the emulsion of the butter and sugar to break, which results in a cake that is grainy, dry, or dense when baked.
- Whisk the cornstarch until smooth: You must completely dissolve the cornstarch and ensure there are no lumps before adding the warmed cream, otherwise the lumps will seize up and be virtually impossible to remove.
- Room temperature eggs hack: In a bowl, add warm (not hot) tap water and add eggs (still in their shells) for 20 minutes.
- Don’t stop whisking the pastry cream: When making pastry cream, some people get nervous, but you do not have to worry about it scrambling as long as you constantly whisk. Whisk constantly while adding the warm cream to temper the eggs, and whisk constantly while the cream heats and thickens in the pan.
- Don’t pack the flour: For the best results, make sure you measure the flour correctly as too much flour can result in dense, drier cakes. When measuring flour, scoop the flour into the measuring cup and level instead of scooping the cup into the flour which could cause it to compress.
- Whisk the eggs for the full 5 minutes: In order to achieve a light, fluffy sponge with tender crumbs, you must incorporate as much air as possible. The trapped air will expand in the oven, which is what creates the magic of the cake rising. Whisk until the eggs are very light, airy, and thick. Your cake will not rise as high or be as tender if you don’t cream them enough.
- How to know when the eggs are done: You know your eggs are done when you can stop the beaters and the mixture falls back like a ribbon instead of blending back into the mixture immediately.
- Don’t overmix the flour: By folding the flour in rather than mixing it, you will be able to compensate for overmixed flour, but do make sure you are gentle. You want to keep the batter light and fluffy by folding the flour in rather than mixing it. When folding flour into beaten eggs, use a spatula to cut through and lift the flour just until it is incorporated.
- Use your scale to make even cakes: Put the batter into two prepared cake tins. Weigh each tin for two perfectly even baked cakes.
- Bake the cakes immediately: Preheating your oven before making the cake batter will allow you to put it in the oven quickly. Just think of how quickly bubbles rise and pop. We don’t want them popping before the cakes are baked. Instead, we need to trap those bubbles so that the cakes rise higher and are softer.
- Don’t overbake the cakes: You know it’s done when you gently press down on the top and it springs back up. If the indentation remains, cook the cake a little longer.
- Don’t underbake the cakes: A little indentation is OK and can be leveled, but you don’t want any doughy texture, or else the center won’t set. For that reason, don’t underbake the cakes or they will sink in the middle.
- Use quality chocolate for the ganache: Baking chocolate bars melt better due to their higher cocoa butter content. If you have to use chocolate chips, choose a brand with a higher cocoa butter content, such as Guittard or Ghirardelli. Other chocolate brands contain less cocoa butter and won’t melt as seamlessly, leaving you with hardened chocolate pieces.
- Don’t skip the corn syrup: Even after refrigeration, the corn syrup keeps the chocolate glaze shiny, smooth, and pliable.
- Slice with a hot knife: If you want clean slices of Pioneer Woman Boston Cream Pie, you should use a hot knife. You can run the knife under hot water or fill a large glass with hot water, then dip the knife in the water before cutting. Wipe the knife clean with a paper towel after each cut, then repeat.
FAQ Section
Pioneer Woman Boston Cream Pie should be refrigerated since the pastry cream contains dairy. Cover it with a cake container or foil and refrigerate for up to 5 days. However, the first and second days are the freshest. To serve, slice the cake with a hot knife and place it at room temperature for 30-60 minutes so the chocolate glaze can come to room temperature (it’s 10X better with a softer glaze).
Although the cakes can be frozen, the assembled Pioneer Woman Boston Cream Pie should not be frozen because the pastry cream contains cornstarch, which will cause the filling to weep, break down and become watery upon thawing. If you want to freeze the pie, you can find another filling recipe that uses flour instead.

Try More Recipes:
Pioneer Woman Boston Cream Pie Nutrition Facts
Amount Per Serving
- Calories 325
- Total Fat 7.4g
- Saturated Fat 2.7g
- Sodium 438.1mg
- Potassium 125mg
- Total Carbohydrate 56.5g
- Dietary Fiber 2g
- Sugars 27.5g
- Protein 2g
Nutrition Facts Source: Source


Pioneer Woman Boston Cream Pie
Description
Pioneer Woman Boston Cream Pie is an American classic, a trifecta of tender sponge cake layered with rich vanilla pastry cream covered in a silky chocolate glaze. It’s what sweet dreams are made of!
Ingredients
Pastry Cream:
Hot Milk Sponge Cake:
Chocolate Glaze:
Instructions
- Over medium heat, add the heavy cream, 1/2 cup milk, sugar, and salt to a medium saucepan. Bring to a simmer, then remove from heat.
- Whisk together 1/2 cup milk, egg yolks, and cornstarch in a medium bowl until smooth. As you whisk constantly, pour 1/4 cup of the hot cream mixture into the egg mixture, then add another 1/4 cup, followed by another 1/4 cup, followed by the remainder of the cream in a slow stream (don’t stop whisking until all of the creams is added).
- Back into the saucepan, pour the tempered mixture. Over medium heat, bring to a simmer, whisking constantly until it is the texture of thick pudding. After thick and glossy and bubbles are popping on the surface, cook for an additional minute.
- Through a fine mesh strainer, strain the mixture into a bowl, then add butter and vanilla until completely smooth. Spray a piece of plastic wrap lightly with nonstick cooking spray and place it directly on the pastry cream (this prevents skin from forming). Let cool in the refrigerator for at least 2 hours, up to 2 days.
- Preheat the oven to 325°F. Prepare two 9-inch round cake pans by lining them with parchment paper and spraying them with nonstick cooking spray with flour, or buttering and flouring them.
- Whisk together the flour, baking powder, and salt in a medium bowl.
- Microwave the milk and butter in a microwave-safe liquid measuring cup or bowl until the butter has melted. Stir in the vanilla. Wrap in foil to keep warm.
- Whisk eggs and sugar together on high speed until they are thick, airy, light, and fluffy, about 4-5 minutes with a stand mixer fitted with a whisk attachment, or using a hand mixer fitted with a whisk attachment. As soon as the mixture is done, it should fall back like a ribbon that does not dissolve back into the mixture right away.
- Slowly whisk the warm milk and butter into the egg mixture until combined with the mixer on low speed. Fold in the flour mixture gently after removing the cake from the mixer. Be careful not to overmix.
- Divide the batter evenly between the prepared cake pans as quickly as possible (a kitchen scale is helpful for even cakes).
- Bake the cakes until an inserted toothpick comes out clean and the edges begin to pull away from the pan, approximately 23-28 minutes. Press gently on the top and it should spring back up. If the indentation remains, cook the cakes for a little longer. (Times can vary depending on your pans)
- Cool the cakes completely in the pans. Upon cooling, the cakes can be wrapped in plastic wrap and stored at room temperature for up to 24 hours until assembling cake.
- Place one of the cakes right-side-up in the center of a cake plate or pedestal. Spread the pastry cream 1/4 inch from the edges of the cake.
- Cover the cream with the second cake, bottom side up. Lightly press to adhere and spread the cream to the edges. Place the cake in the refrigerator while you prepare the chocolate glaze.
- In a medium microwave-safe bowl, combine the heavy cream and corn syrup. Microwave for about two minutes, until just boiling. Remove from the microwave and stir in the chopped chocolate. Allow standing for 5 minutes to allow the chocolate to melt, then whisk vigorously until smooth.
- Spread the glaze over the cake and let it drip down the edges if desired. For cleaner cuts, chill the ganache for 30-60 minutes in the refrigerator or cover with a cake dome until ready to serve. If the cake has been refrigerated for more than 1 hour, let it come to room temperature before serving (it will taste better and the glaze will soften).
- Slice with a hot knife for the cleanest cuts. Either run the knife under hot water or fill a large glass with hot water, then dip the knife in the water before each cut. After every cut, wipe the knife clean with a paper towel.
Pastry Cream:
Hot Milk Sponge Cake:
Assemble The Cake:
Chocolate Glaze:
Notes
- Use room temperature egg yolks for the pastry cream: Using this method, the cornstarch will dissolve more smoothly into the egg yolks and aid in tempering the eggs more gradually, so there is less likelihood of scrambling.
- Use room temperature eggs for the cake: Eggs at room temperature allow the batter to whisk to a higher volume, which results in a softer, fluffier texture. Cold eggs, on the other hand, can cause the emulsion of the butter and sugar to break, which results in a cake that is grainy, dry, or dense when baked.
- Whisk the cornstarch until smooth: You must completely dissolve the cornstarch and ensure there are no lumps before adding the warmed cream, otherwise the lumps will seize up and be virtually impossible to remove.
- Room temperature eggs hack: In a bowl, add warm (not hot) tap water and add eggs (still in their shells) for 20 minutes.
- Don’t stop whisking the pastry cream: When making pastry cream, some people get nervous, but you do not have to worry about it scrambling as long as you constantly whisk. Whisk constantly while adding the warm cream to temper the eggs, and whisk constantly while the cream heats and thickens in the pan.
- Don’t pack the flour: For the best results, make sure you measure the flour correctly as too much flour can result in dense, drier cakes. When measuring flour, scoop the flour into the measuring cup and level instead of scooping the cup into the flour which could cause it to compress.
- Whisk the eggs for the full 5 minutes: In order to achieve a light, fluffy sponge with tender crumbs, you must incorporate as much air as possible. The trapped air will expand in the oven, which is what creates the magic of the cake rising. Whisk until the eggs are very light, airy, and thick. Your cake will not rise as high or be as tender if you don’t cream them enough.
- How to know when the eggs are done: You know your eggs are done when you can stop the beaters and the mixture falls back like a ribbon instead of blending back into the mixture immediately.
- Don’t overmix the flour: By folding the flour in rather than mixing it, you will be able to compensate for overmixed flour, but do make sure you are gentle. You want to keep the batter light and fluffy by folding the flour in rather than mixing it. When folding flour into beaten eggs, use a spatula to cut through and lift the flour just until it is incorporated.
- Use your scale to make even cakes: Put the batter into two prepared cake tins. Weigh each tin for two perfectly even baked cakes.
- Bake the cakes immediately: Preheating your oven before making the cake batter will allow you to put it in the oven quickly. Just think of how quickly bubbles rise and pop. We don’t want them popping before the cakes are baked. Instead, we need to trap those bubbles so that the cakes rise higher and are softer.
- Don’t overbake the cakes: You know it’s done when you gently press down on the top and it springs back up. If the indentation remains, cook the cake a little longer.
- Don’t underbake the cakes: A little indentation is OK and can be leveled, but you don’t want any doughy texture, or else the center won’t set. For that reason, don’t underbake the cakes or they will sink in the middle.
- Use quality chocolate for the ganache: Baking chocolate bars melt better due to their higher cocoa butter content. If you have to use chocolate chips, choose a brand with a higher cocoa butter content, such as Guittard or Ghirardelli. Other chocolate brands contain less cocoa butter and won’t melt as seamlessly, leaving you with hardened chocolate pieces.
- Don’t skip the corn syrup: Even after refrigeration, the corn syrup keeps the chocolate glaze shiny, smooth, and pliable.
- Slice with a hot knife: If you want clean slices of pie, you should use a hot knife. You can run the knife under hot water or fill a large glass with hot water, then dip the knife in the water before cutting. Wipe the knife clean with a paper towel after each cut, then repeat.
Servings 8 – 10
- Amount Per Serving
- Calories 325
- % Daily Value *
- Total Fat 7.4g12%
- Saturated Fat 2.7g14%
- Sodium 438.1mg19%
- Potassium 125mg4%
- Total Carbohydrate 56.5g19%
- Dietary Fiber 2g8%
- Sugars 27.5g
- Protein 2g4%
* Percent Daily Values are based on a 2,000 calorie diet. Your daily value may be higher or lower depending on your calorie needs.
Caroline
Monday 13th of November 2023
I’m making this to have for my Thanksgiving dessert. My husband requested something different and I think we will love this! Just wondering if I should use light or dark corn syrup? Thanks!
4waystoyummy
Wednesday 17th of May 2023
I remember this cake(pie) from my childhood upbringing in upstate NY. My favorite! I now live in the Pacific NW and have never seen it here. Today I am making this recipe. Because I prefer smaller size cakes, and with more layers I wondered how well this cake would adapt to an 8 in pan. I'm sticking with the 9 in today...but if you can share how I could make this in an 8 in or better yet...a 6 inch cake I would be ever so grateful. Two people do not need to eat a lot of cake, and many of our friends agree and steer clear of baked goods. I don't want to forgo the pleasure but like most folks I need to dial it back. Many thanks. Wish me luck!!
Sandy
Thursday 20th of April 2023
I made this cake for a friend’s birthday and it was a hit! It was delicious! Can’t wait to make it again. The only problem I had was “folding” in the flour mixture. I was afraid to mix it too much and ended up not mixing it enough. I had one pocket of flour that I found in a cake piece, but it was a great recipe! I made the cake and the filling the night before. I make the ganache and put it together the next morning. It turned out great.